QuickStart Guide
This quickstart guide provides a basic setup flow: registering a VEN and creating a simple event.
By default, an administrator account is set up and credentials will be shared via email. Your account will be set up with standard defaults that do not need to be updated in the quickstart. Access the page at https://canvas.gridfabric.io and enter your login credentials.
If you are a Plaid customer using Canvas Cloud for testing or demo purposes, we recommend that you refer primarily to the quickstart guide for Plaid. It has more specific instructions for setting up Canvas Cloud with Plaid.
VEN Registration
This guide assumes that you already have a VEN you are trying to connect to, or you are working with a party that does.
VEN Setup
VENs use the following URL to connect to Canvas Cloud:
https://canvas.gridfabric.io:4433/oadrapi/ven/<base_url>
Where <base_url> is provided in the configuration emailed to you. You can also find it by going to VTN Config section.
Some VENs require the full OpenADR path while others need just the url provided above. If communication is failing with a 404 not found error, trying using the full OpenADR path:
- 2.0a path:
/oadrapi/ven/<base_url>/OpenADR2/Simple/EiEvent - 2.0b path:
/oadrapi/ven/<base_url>/OpenADR2/Simple/2.0b/
Configure the VEN name and/or the VEN ID. If neither of these fields can be configured in the VEN, the VTN will match the request based on the certificate fingerprint. Universal Devices ISY is an example of a VEN that does not use a pre-configured VEN Name or VEN ID.
Generate certificates
Request for a Test certificate at https://www.eonti.com/openadr/.
You will see the following screen.
Click on the button 'Test Certificate Request'. You will see the following page with a form.
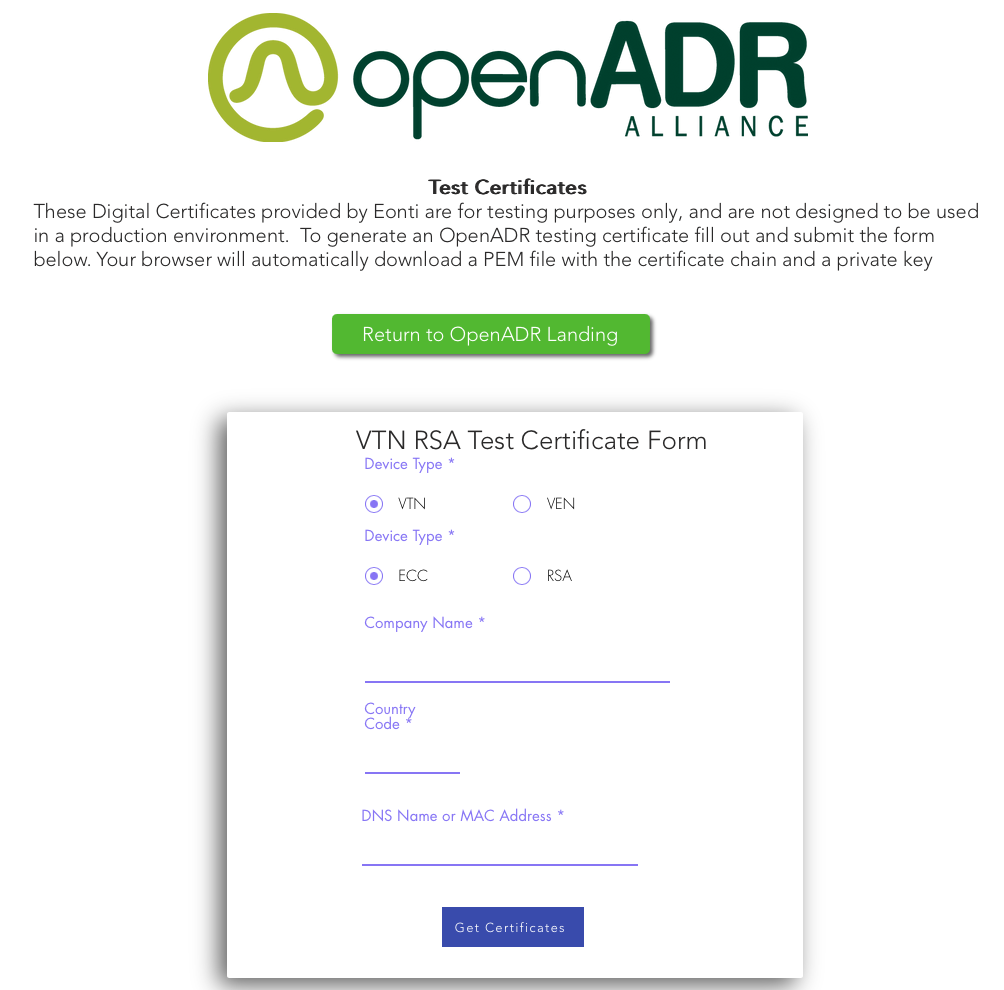
The only things you must update are:
- Device type VEN
- Device type RSA
- Company Name Your company name
- Country Code Your country (US is default)
- DNS Name or MAC Address Name of your certificate. Enter something descriptive (this will not be used)
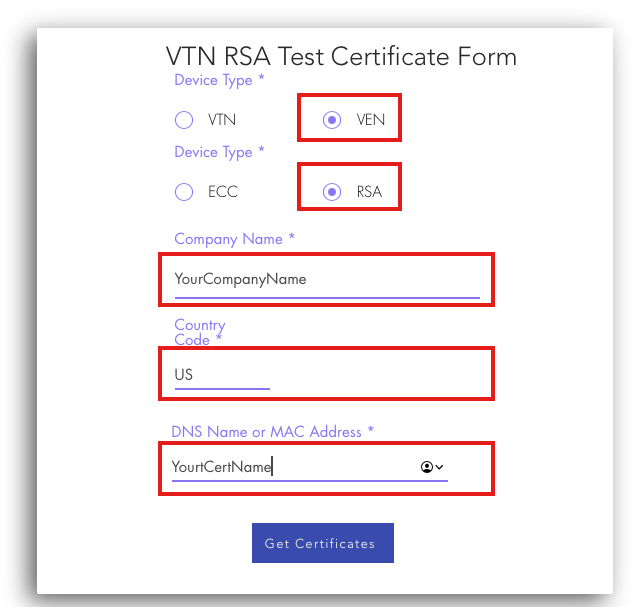
Click Get Certificates to submit request for your certificates. Your download should begin immediately. Unzip the folder and view the contents. The downloaded content should look similar to the following.

Here's a description of each file:
- DemoCertsRoot.pem: CA certificate file
- DemoCertsICA.pem: CA certificate file
- DemoCertsEE.pem: Certificate file
- PrivateKey.txt: Certificate private key
The first two files are certificate authority files and are the same in every certificate bundle generated from Eonti. The next two files - the private key and certificate file - contain the RSA private/public key pair and some information that was signed by Eonti. The certificate file can be verified using the two CA certificate files.
Add downloaded files to your VEN.
Again, if you are using Plaid, please follow the certificate guide for Plaid at this step for how to configure these certificates.
If not, test cacerts for Canvas can be downloaded here. These are test cacerts from Kyrio (you can also obtain these by downloading a VTN certificate from Kyrio). Please set up your certificates as specified by the VEN / library you are using.
Add VEN to VTN
Typically, the VTN operator will be responsible for creating a VEN Name or ID, so they can ensure that each VEN is unique. This is not necessary. However, it is important that the VEN and the VTN have the same registration information, so make sure that coordination happens as you take this step.
To add a VEN, click on the VENs tab on the left hand side. You will see the following screen. Click on Create Ven, and select Standard.
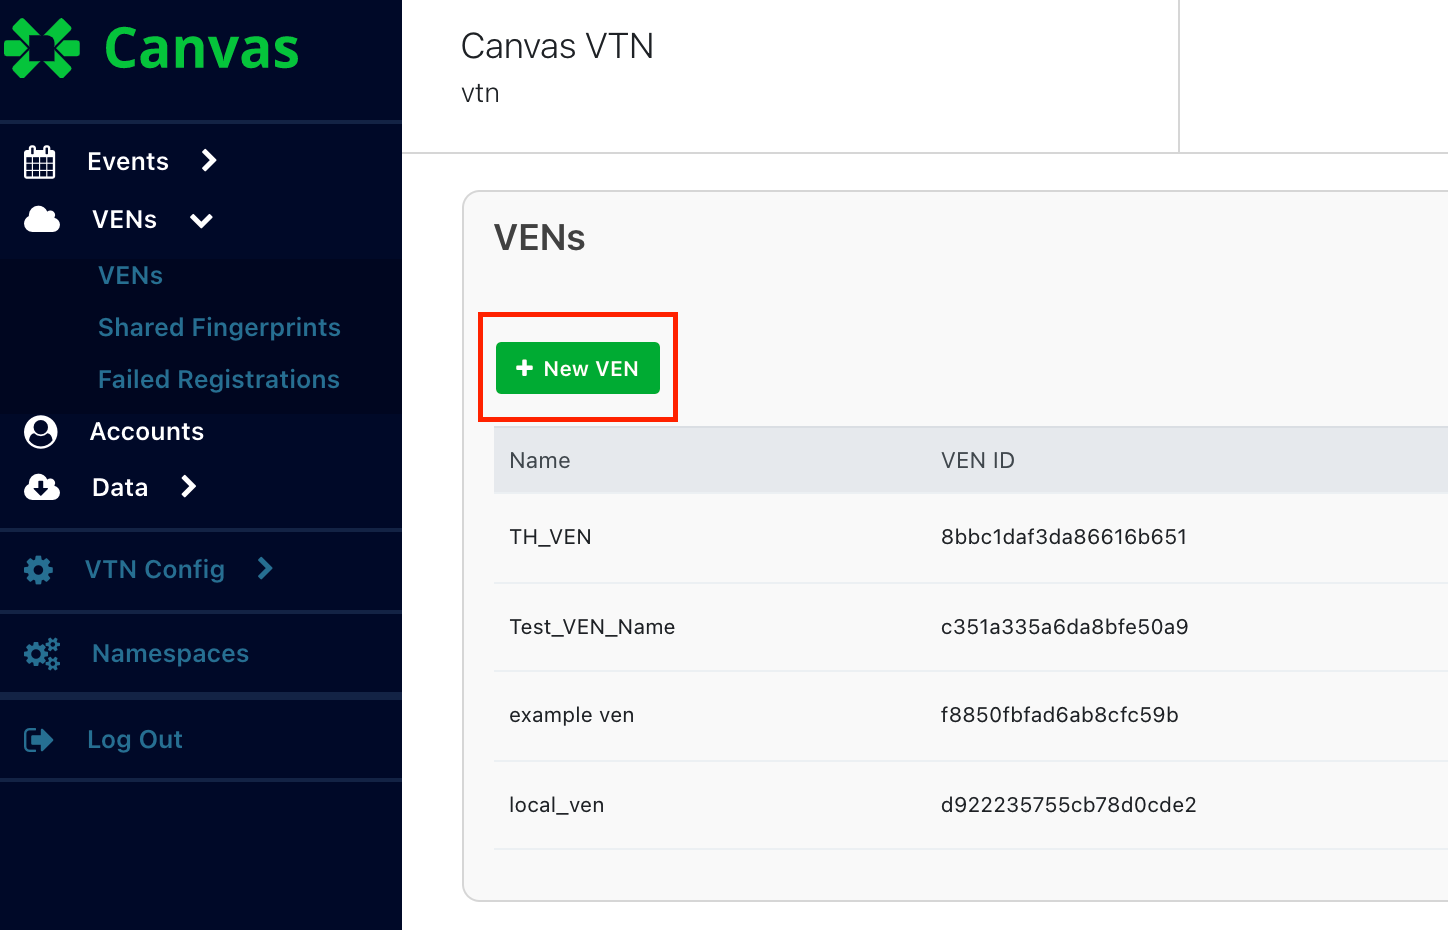
The following form is displayed:
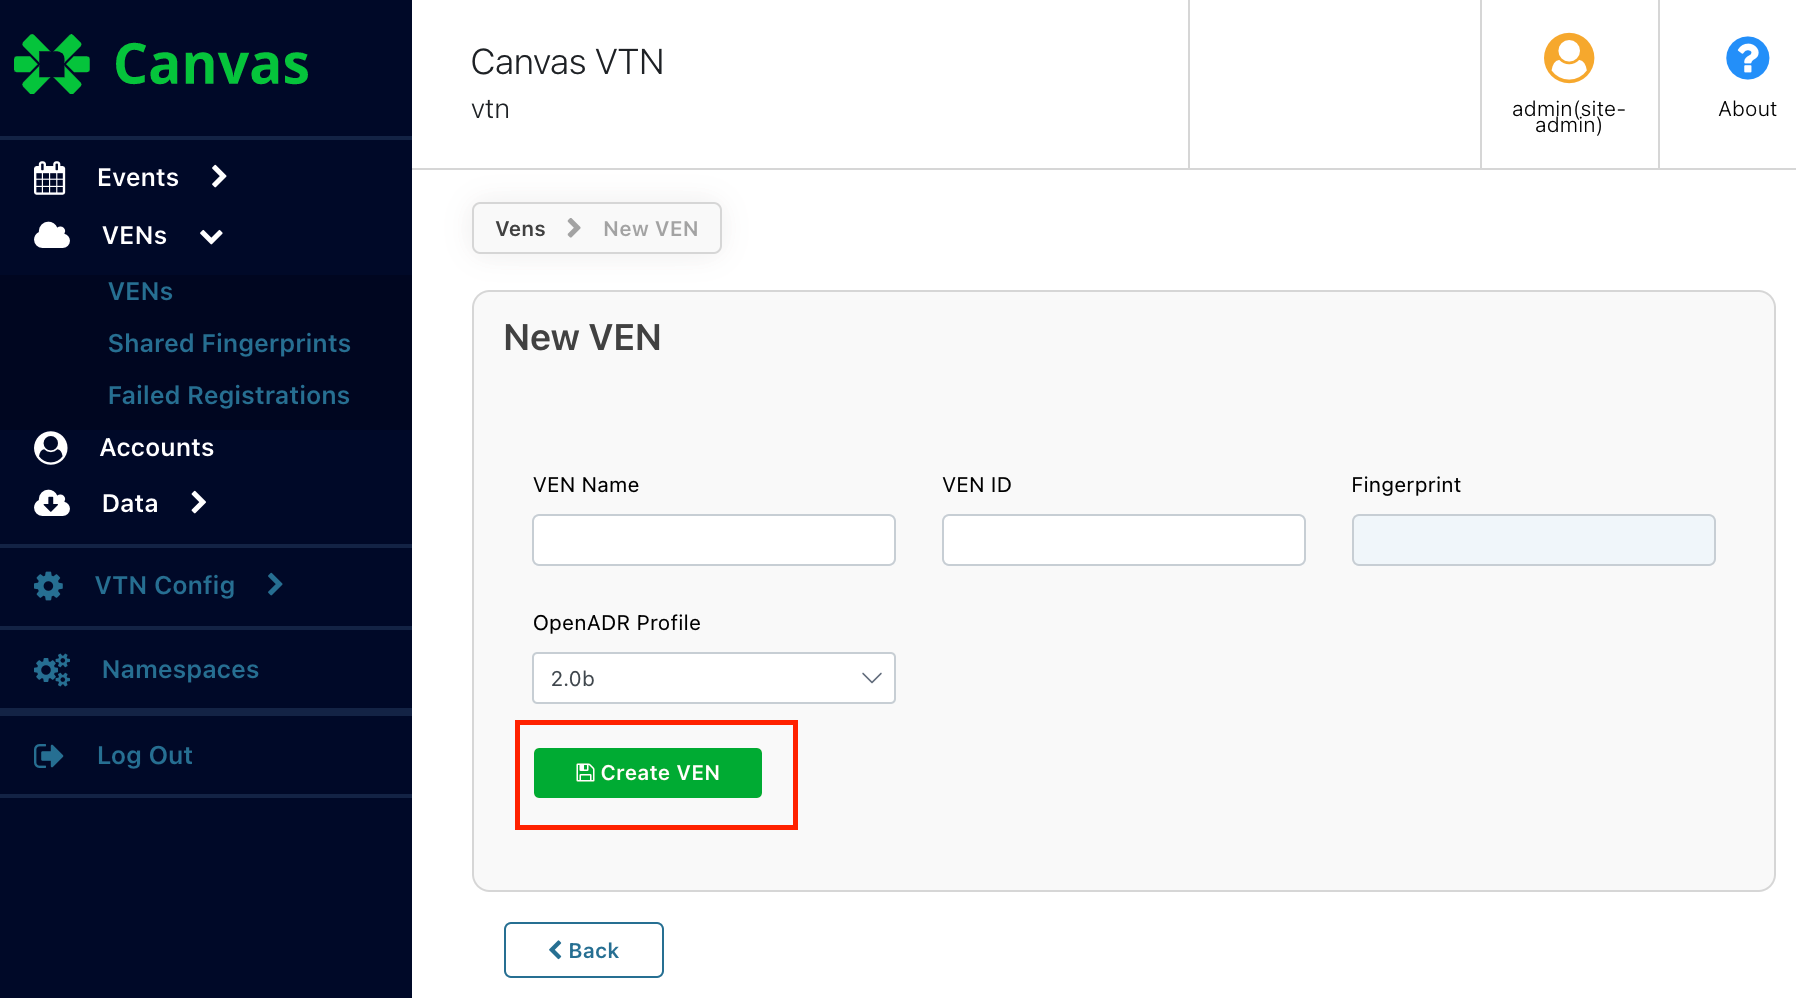
- VEN Name and VEN ID: Each VEN needs a unique name OR ID, they do not need both. Fill in the one that your VEN already has, or assign one and add it to the VEN. Leave the ID blank if you would like one to be generated for you.
- Fingerprint: The fingerprint is the SHA1 hash of the certificate. Windows and Linux have tools for reading this value from the certificate. OpenSSL can also be used to generate the hash or you can use your built in certificate manager (e.g. apple's keychain) to inspect the certificate for the hash. If you’re unable to get the hash from the VEN certificate, leave this field blank for now. The adding a VEN section shows how to get the fingerprint by using the failed registrations method.
- OpenADR profile: Select 2.0a or 2.0b depending on which version of OpenADR the VEN is using. If the incorrect version is selected, you might see XML parsing errors on the VEN side.
Fill in the form and click the Create VEN button. The VTN is now ready for the VEN to register and start communicating.
In the VENs section, you should see the VEN and it's status should be "Online". Your VEN should also confirm that it has registered with the VTN.
Creating an Event
Market Context
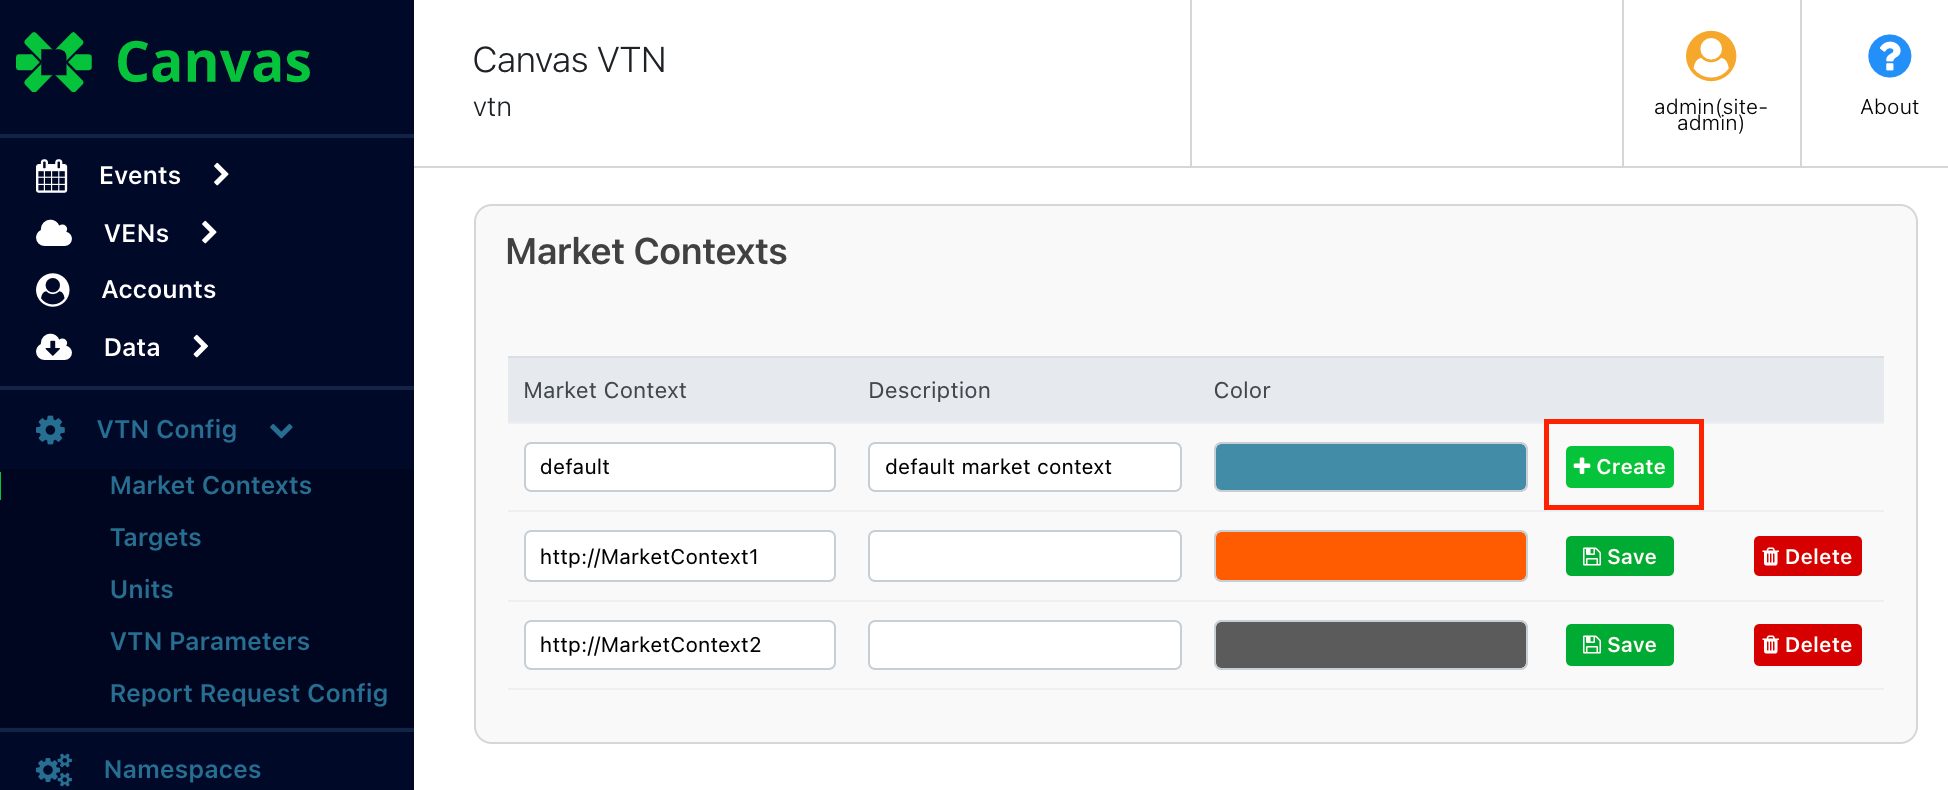
Before creating an event, a market context must be created since it is a mandatory part of an OpenADR event. Market Context refers to a particular DR program, and is sometimes used in live programs to differentiate between programs. For quick start purposes, a market context can just be set up as default.
Click on VTN Config on the left hand side to create a market context. You may enter the name as default, and whatever you like for description and color, which are required fields to enter but only used internally in the product so do not need to follow any guidelines. Make sure that the VEN is configured to accept this market context, or it will reject the event you create.
Create Event
Now, create an Event. Click on the Events Tab, and click “Create Event”, then select “Standard”.
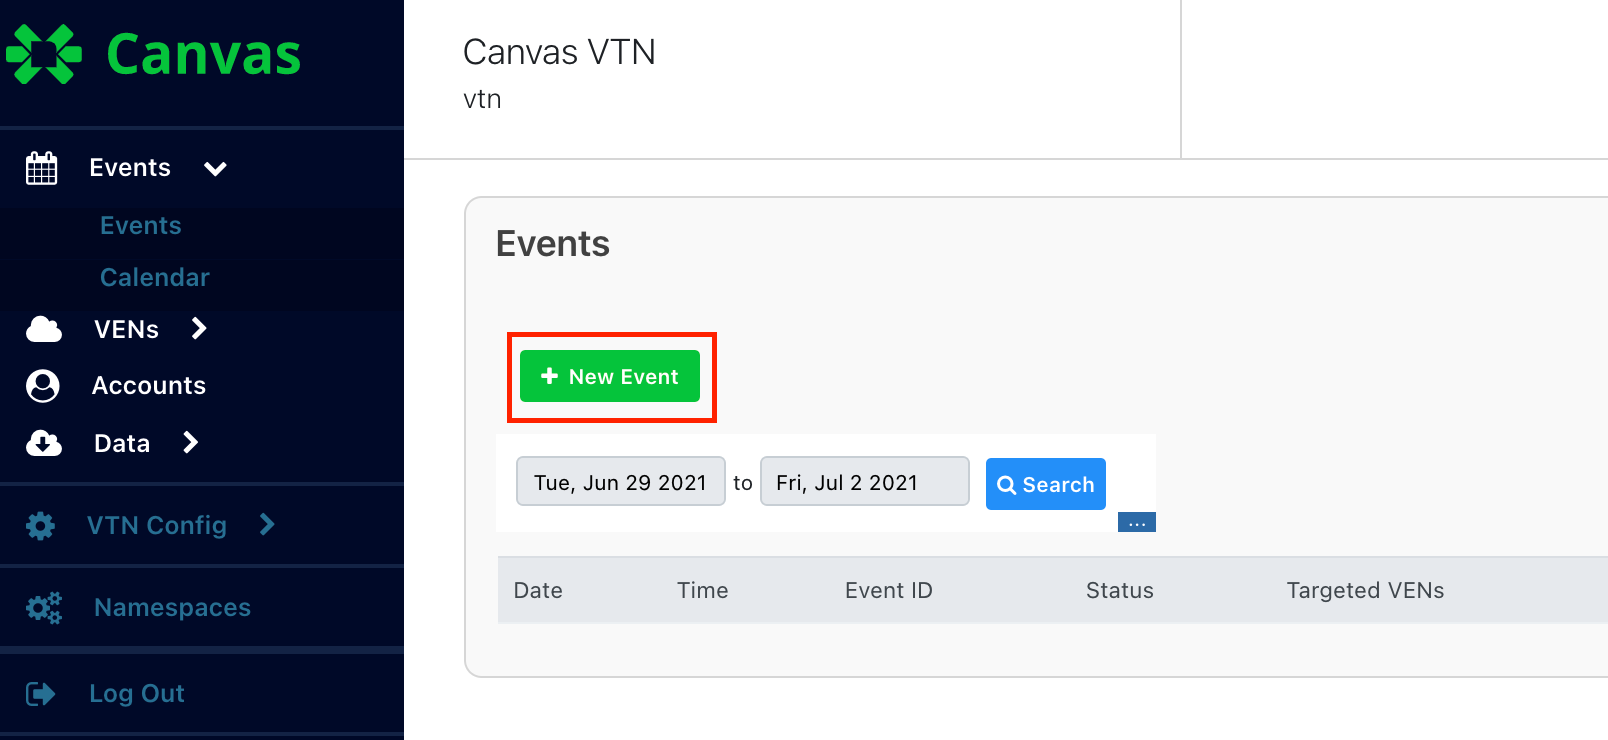
You will see a form to create an event.
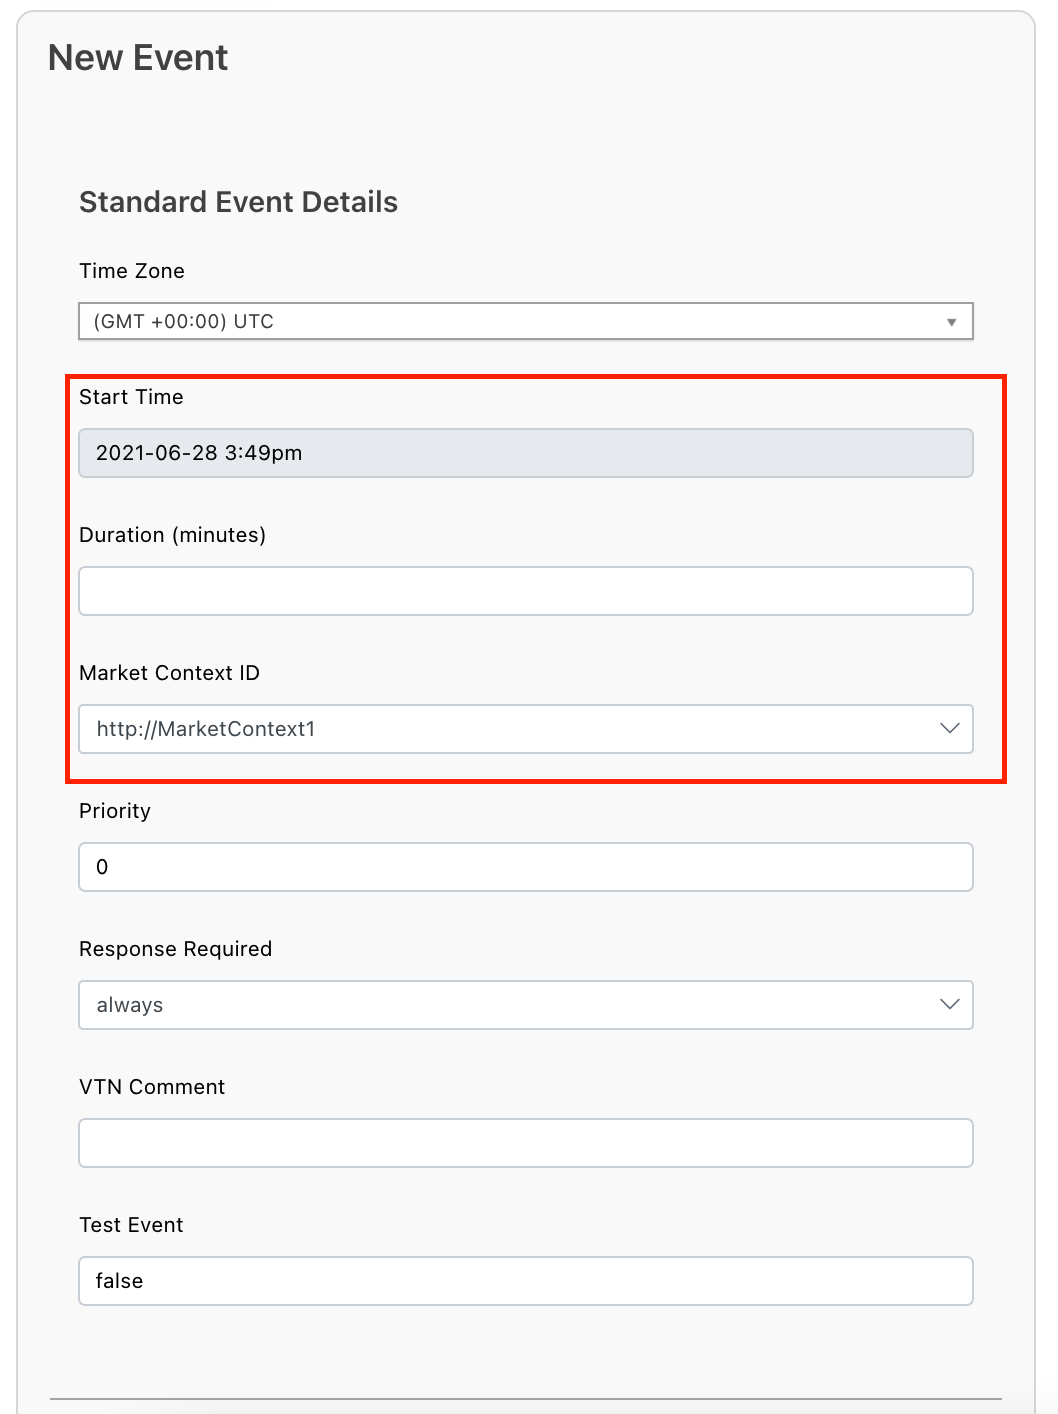
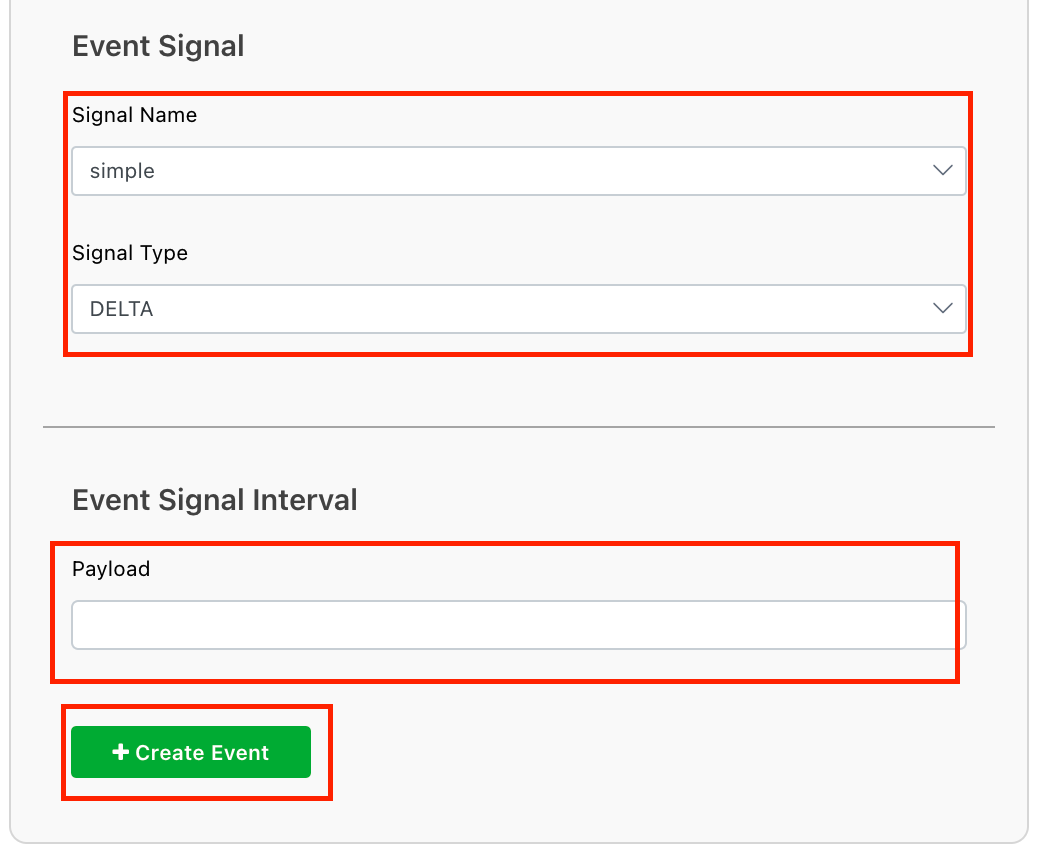
Creating an event is more fully explained in the documentation. For now, just update the following fields:
- Start Time is defaulted to current time, change it to a few minutes in the future
- Duration should be something short just for testing, e.g. 5 minutes
- Market Context ID should default to the market context you just created (or any market context that the VEN will opt into)
- Signal Type: LEVEL should be used by default to go with the simple signal. Note that in OpenADR, certain signal names and signal types go together. For testing purposes, we allow wrong combinations, but the user should know what correct combinations are. Refer to 8.2.2 in the OpenADR specification documentation for full signal definitions.
- Payload: update to 2.
After creating the event, your next step will be to review the event and add any additional customizations before publishing. This is where you can add multiple different signals to an event, ramp up periods, randomization, and more.
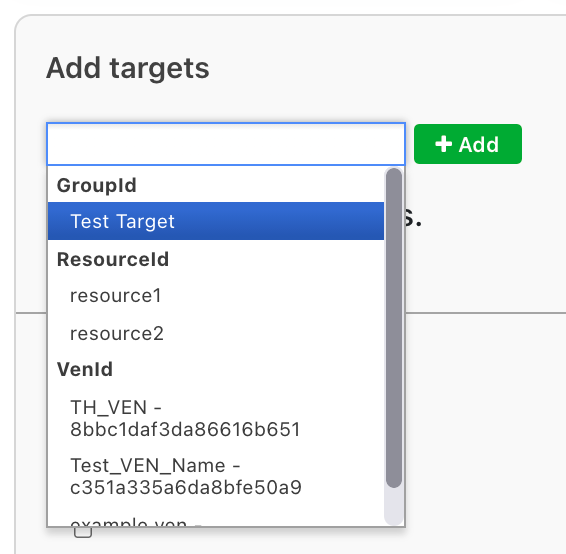
For the quick start, the only important customization is to click on the Targets tab and add your VEN.
You may now select Publish Event under the Publish tab.
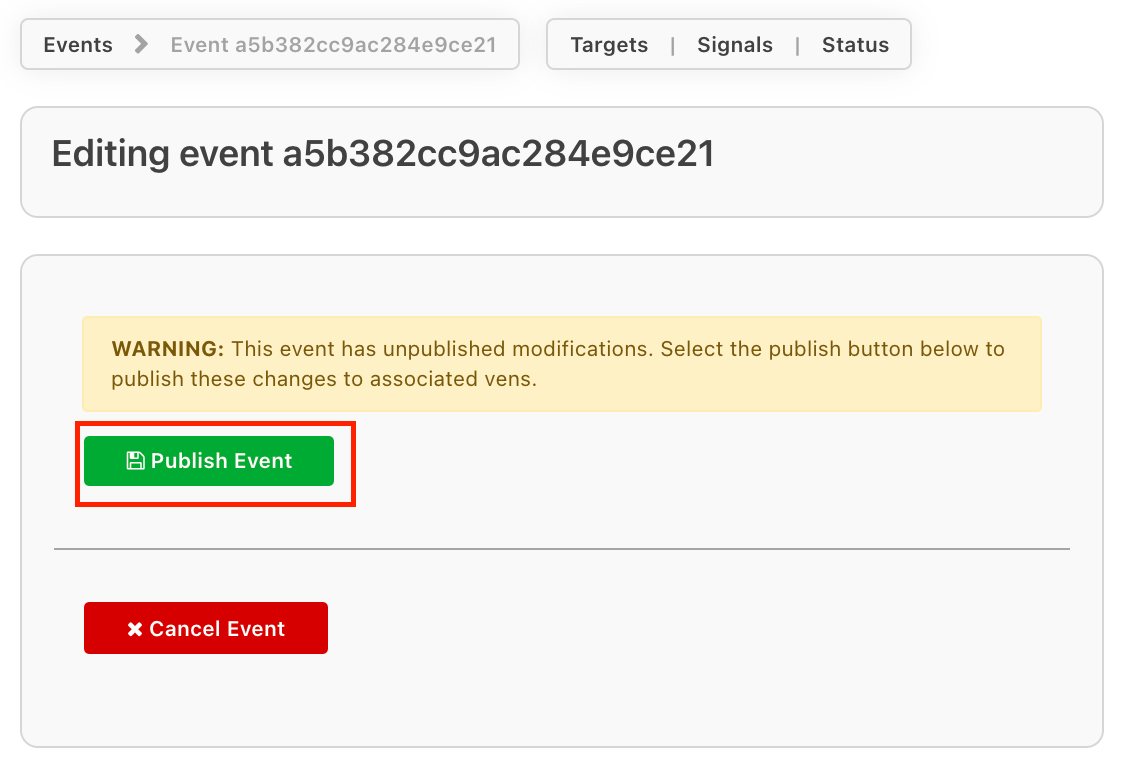
After the event has been published, you will see it displayed with its current status. You should see that the event now flows through to your VEN. You can check to see if the VEN has opted in using the UI by clicking into the event and viewing "status".
If you are having any issues connecting the VEN, please refer to the VEN troubleshooting or faq sections.
Summary
To recap, you have:
- Connected a VEN to your VTN
- Created an event and seen the results
Most additional work on the VTN will be an iteration of the above steps, with added steps and complexity as needed to fulfill test or pilot goals.
See the full Canvas UI guide for more details on how to use Canvas Cloud to implement more advanced features of OpenADR.